Overview
Every DNS query your devices send — whether it's loading a news site or a smart TV phoning home — passes through a resolver. Most home networks blindly forward those queries to your ISP's resolver, or to Google (8.8.8.8) or Cloudflare (1.1.1.1). That means a third party logs everything you look up, every device, all day long.
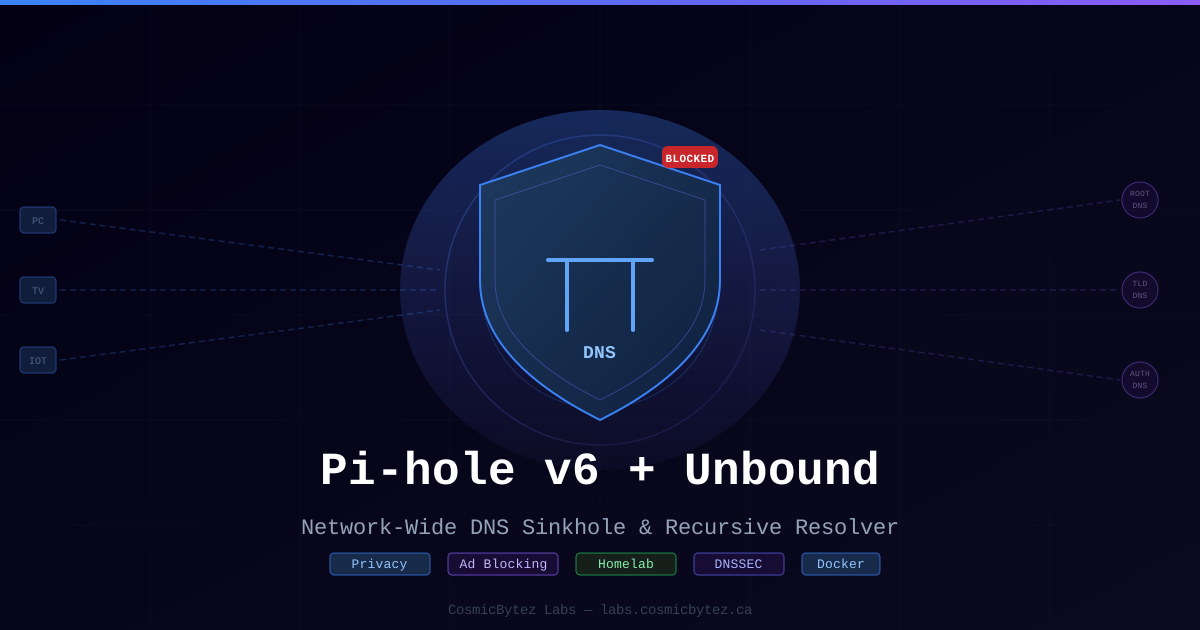
Pi-hole is a DNS sinkhole: it sits between your devices and the internet, intercepts every DNS query, and returns 0.0.0.0 for known ad servers, telemetry endpoints, and malware domains. The result is network-wide blocking with no browser extensions needed — it works on smart TVs, game consoles, IoT devices, and phones.
Unbound is a validating, recursive DNS resolver. Instead of forwarding your queries to Google or Cloudflare, it starts from the root DNS servers and walks down the DNS tree itself to resolve every hostname. Combined with Pi-hole, Unbound means:
- No upstream DNS provider sees your query history
- DNSSEC validation at every step
- Zero dependency on third-party resolvers staying up
By the end of this guide you'll have:
- Pi-hole v6 running in Docker, blocking ads and trackers across your entire LAN
- Unbound running as Pi-hole's upstream resolver, resolving directly from root servers
- DNSSEC validation enabled
- Your router configured to push Pi-hole as the DNS server for all devices
- Custom local DNS records for your homelab services
Architecture
LAN Devices (PC, phone, TV, IoT)
        │
        │ DNS queries (port 53)
        ▼
┌─────────────────────────┐
│     Pi-hole v6          │
│  - Blocklist matching   │  ◄── blocklists (StevenBlack,
│  - Query logging        │       abuse.ch, OISD, etc.)
│  - Admin web UI         │
└──────────┬──────────────┘
           │ forwarded queries (non-blocked)
           │ port 5335 (internal)
           ▼
┌─────────────────────────┐
│     Unbound             │
│  - Recursive resolution │
│  - DNSSEC validation    │
│  - Root hints cache     │
└──────────┬──────────────┘
           │
           │ iterative queries (ports 53/853)
           ▼
   Root DNS Servers → TLD Servers → Authoritative Servers
Both services run in Docker on the same host. Pi-hole listens on port 53 of the host's LAN IP. Unbound listens only on 127.0.0.1:5335 — not exposed externally. Pi-hole is configured to use 127.0.0.1#5335 as its only upstream resolver.
Prerequisites
- A Linux host with Docker and Docker Compose installed (a Raspberry Pi, a VM, or a spare machine all work)
- A static IP assigned to the Docker host (e.g.,
192.168.1.10) — set this in your router's DHCP reservations - Router admin access to change the DNS server pushed to clients
- Ports 53/TCP and 53/UDP available on the host (check
sudo ss -tlnup | grep ':53'— disablesystemd-resolvedif needed)
Disable systemd-resolved (Ubuntu/Debian)
On Ubuntu hosts, systemd-resolved occupies port 53. Disable it:
sudo systemctl disable --now systemd-resolved
sudo rm /etc/resolv.conf
echo "nameserver 1.1.1.1" | sudo tee /etc/resolv.confAfter Pi-hole is running you'll update /etc/resolv.conf to point at 127.0.0.1.
Step 1: Directory Structure
Create the project directory:
mkdir -p ~/pihole-unbound/{pihole,unbound}
cd ~/pihole-unboundStep 2: Unbound Configuration
Unbound runs as a recursive resolver. Create its config file:
mkdir -p unbound/conf.dCreate unbound/conf.d/pi-hole.conf:
server:
    # Listen only on localhost, port 5335 — Pi-hole is the only client
    interface: 0.0.0.0@5335
    port: 5335
    do-ip4: yes
    do-udp: yes
    do-tcp: yes

    # IPv6 — disable if your network doesn't use it
    do-ip6: no

    # Root hints — Unbound ships these internally, but explicit is fine
    # root-hints: "/opt/unbound/etc/unbound/root.hints"

    # DNSSEC validation
    auto-trust-anchor-file: "/opt/unbound/etc/unbound/root.key"

    # Hardening
    harden-glue: yes
    harden-dnssec-stripped: yes
    harden-referral-path: no
    use-caps-for-id: no
    harden-algo-downgrade: no

    # Privacy
    qname-minimisation: yes
    qname-minimisation-strict: no
    hide-identity: yes
    hide-version: yes

    # Performance
    num-threads: 2
    msg-cache-slabs: 4
    rrset-cache-slabs: 4
    infra-cache-slabs: 4
    key-cache-slabs: 4
    rrset-cache-size: 256m
    msg-cache-size: 128m
    so-rcvbuf: 1m
    prefetch: yes
    prefetch-key: yes
    cache-min-ttl: 3600
    cache-max-ttl: 86400

    # Allow from Pi-hole and localhost only
    access-control: 127.0.0.0/8 allow
    access-control: 172.16.0.0/12 allow

    # Logging — set to 0 for production, 1 for debugging
    verbosity: 0
    log-queries: no

    # Localhost / RFC1918 don't need recursive resolution
    private-address: 192.168.0.0/16
    private-address: 172.16.0.0/12
    private-address: 10.0.0.0/8
    private-address: 169.254.0.0/16
    private-address: fd00::/8
private-address: fe80::/10Step 3: Docker Compose
Create docker-compose.yml in the project root:
services:
  unbound:
    image: mvance/unbound:latest
    container_name: unbound
    restart: unless-stopped
    hostname: unbound
    volumes:
      - ./unbound/conf.d/pi-hole.conf:/opt/unbound/etc/unbound/unbound.conf:ro
    networks:
      dns_net:
        ipv4_address: 172.30.9.2

  pihole:
    image: pihole/pihole:latest
    container_name: pihole
    restart: unless-stopped
    hostname: pihole
    ports:
      - "53:53/tcp"
      - "53:53/udp"
      - "8080:80/tcp"      # Admin UI — change to your preference
    environment:
      TZ: "America/Edmonton"
      WEBPASSWORD: "changeme_use_a_strong_password"
      PIHOLE_DNS_: "172.30.9.2#5335"   # Point at Unbound only
      DNSSEC: "true"
      DNSMASQ_LISTENING: "all"
      VIRTUAL_HOST: "pihole.local"
      # Disable reverse DNS for Pi-hole's own LAN
      REV_SERVER: "true"
      REV_SERVER_CIDR: "192.168.1.0/24"
      REV_SERVER_TARGET: "192.168.1.1"
      REV_SERVER_DOMAIN: "local"
    volumes:
      - ./pihole/etc-pihole:/etc/pihole
      - ./pihole/etc-dnsmasq.d:/etc/dnsmasq.d
    networks:
      dns_net:
        ipv4_address: 172.30.9.3
    depends_on:
      - unbound

networks:
  dns_net:
    driver: bridge
    ipam:
      config:
- subnet: 172.30.9.0/29Note on
WEBPASSWORD: Set a strong password here — this is the Pi-hole admin UI password. In production, use an environment file (.env) and add it to.gitignore.
Step 4: Start the Stack
docker compose up -dWatch logs to confirm both services start cleanly:
docker compose logs -fYou should see Unbound output like unbound[1:0] notice: init module 0: validator and Pi-hole completing its gravity update pull.
Step 5: Verify Unbound Is Resolving
Test Unbound directly from the host (bypassing Pi-hole):
# Query Unbound on its internal port
dig github.com @127.0.0.1 -p 5335

# Confirm DNSSEC validation — look for 'ad' flag in the ANSWER section
dig sigfail.verteiltesysteme.net @127.0.0.1 -p 5335
# SERVFAIL = DNSSEC validation is working (this domain intentionally fails)

dig sigok.verteiltesysteme.net @127.0.0.1 -p 5335
# NOERROR with 'ad' flag = DNSSEC validation passingStep 6: Verify Pi-hole Is Blocking
Pi-hole is now listening on port 53 of your Docker host. Test it:
HOST_IP="192.168.1.10"   # Replace with your server's LAN IP

# This should resolve (not blocked)
dig google.com @$HOST_IP

# These should return 0.0.0.0 (blocked)
dig doubleclick.net @$HOST_IP
dig tracking.g.doubleclick.net @$HOST_IP
dig ads.facebook.com @$HOST_IPOpen the Pi-hole admin UI at http://192.168.1.10:8080/admin and log in with your WEBPASSWORD.
Step 7: Add Blocklists
Pi-hole v6 ships with the default StevenBlack blocklist. Add more via the admin UI under Lists or by editing pihole/etc-pihole/adlists.list.
Recommended high-quality blocklists:
| List | Focus | URL |
|---|---|---|
| OISD Full | Ads + tracking + malware | https://big.oisd.nl |
| HaGeZi Multi Pro | Comprehensive | https://raw.githubusercontent.com/hagezi/dns-blocklists/main/adblock/multi.txt |
| abuse.ch URLhaus | Malware domains | https://urlhaus.abuse.ch/downloads/rpz/ |
| NoCoin Filter | Cryptominer blocking | https://raw.githubusercontent.com/nicehash/NoCoin-Filter-List/master/ublock/NoCoin-filter-list.txt |
After adding lists, run a gravity update:
docker exec pihole pihole -gOr trigger it from the admin UI under Tools → Update Gravity.
Step 8: Configure Your Router
Point your router's DHCP server to advertise Pi-hole as the DNS server for all clients. The exact steps vary by router firmware, but the general process is:
- Log into your router admin panel
- Find DHCP Settings or LAN Settings
- Set Primary DNS to your Pi-hole host IP (e.g.,
192.168.1.10) - Set Secondary DNS to a fallback (e.g.,
1.1.1.1) — clients will only use this if Pi-hole is unreachable - Save and renew DHCP leases on your devices
To force immediate DNS update on a Linux client:
sudo dhclient -r && sudo dhclient
# Verify
cat /etc/resolv.conf
# Should show nameserver 192.168.1.10On Windows: ipconfig /release then ipconfig /renew.
Step 9: Add Local DNS Records
Pi-hole can resolve your homelab hostnames so you don't need to remember IPs. In the admin UI go to Local DNS → DNS Records and add entries:
| Domain | IP |
|---|---|
pihole.local | 192.168.1.10 |
traefik.local | 192.168.1.10 |
grafana.local | 192.168.1.10 |
nas.local | 192.168.1.20 |
Now any device on your network can resolve grafana.local without /etc/hosts edits.
Testing & Validation
Confirm end-to-end blocking from a client
From any device on the LAN (after DHCP renewal):
# macOS / Linux
nslookup doubleclick.net
# Should return: Address: 0.0.0.0

nslookup google.com
# Should return a real IPCheck the Pi-hole query log
The admin UI Query Log tab shows every DNS query in real time: which device asked, what they queried, whether it was blocked, and which blocklist matched.
Confirm DNSSEC is active
dig +dnssec google.com @192.168.1.10
# Look for 'ad' (authenticated data) flag in the response headerMonitor blocking rate
The dashboard home page shows a 24-hour graph of total queries vs. blocked queries. A healthy ad-heavy network typically sees 15–30% of queries blocked.
Advanced Configuration
Whitelist / Blacklist
If a legitimate site gets blocked (false positive), add it to the whitelist via the admin UI or CLI:
docker exec pihole pihole --white-add safesiteexample.comForce-block a specific domain:
docker exec pihole pihole --blacklist-add spamsite.example.comRegex Filters
Pi-hole supports regex-based domain blocking under Domains → Add Domain with the Regex type. Block entire ad-serving patterns:
^ads?[0-9]*\.
^tracking\.
^telemetry\.
(^|\.)adservice\.google\.(com|ca|co\.uk)$
Pi-hole as DHCP Server (Optional)
If you want Pi-hole to hand out IP addresses in addition to DNS, disable your router's DHCP server and enable Pi-hole's DHCP in Settings → DHCP. This ensures every device uses Pi-hole as DNS regardless of manual network configuration. Useful if your router doesn't allow custom DNS in its DHCP settings.
Pi-hole Groups
Pi-hole v6 introduces Groups — assign devices to groups and apply different blocklists per group. Useful for:
- Children's devices: stricter content filtering
- Work machines: no adult content blocklists
- IoT devices: heavy telemetry blocking
In the admin UI: Groups → Add Group, then assign clients and link blocklists to groups.
Conditional Forwarding for Split DNS
If you have a domain served by your internal DNS (e.g., an Active Directory domain corp.local), add a conditional forward so Pi-hole doesn't try to recurse for it:
In pihole/etc-dnsmasq.d/02-custom.conf:
server=/corp.local/192.168.1.5Restart Pi-hole: docker compose restart pihole
Deployment Considerations
High Availability (Two Pi-holes)
A single Pi-hole is a critical single point of failure — if the container crashes, every device on your network loses DNS. The standard solution:
- Run a second Pi-hole on a different host (e.g., a Raspberry Pi as a physical backup)
- Configure it identically with
pihole-cloudsyncor manual gravity sync - Set it as the secondary DNS in your router DHCP settings
The secondary Pi-hole handles queries when the primary is down, and serves as a fallback for DHCP DNS renewal.
Persistent Data
The docker-compose.yml above mounts ./pihole/etc-pihole and ./pihole/etc-dnsmasq.d as volumes. All blocklists, custom DNS records, settings, and logs persist across container restarts and upgrades.
Back up ./pihole/etc-pihole/ regularly — it contains your entire Pi-hole config.
Updating
docker compose pull
docker compose up -dPi-hole and Unbound are both frequently updated. Schedule a monthly pull or add a Watchtower container to auto-update.
Resource Usage
On a Raspberry Pi 4 (2 GB RAM):
- Pi-hole: ~50 MB RAM, ~1% CPU at idle
- Unbound with 256 MB cache: ~260 MB RAM, <1% CPU at idle
- Both comfortably fit on a Pi 4 alongside other services
Next Steps
DNS-over-HTTPS (DoH) or DNS-over-TLS (DoT) Upstream
If you prefer encrypted DNS to Cloudflare over plain recursive resolution, add cloudflared as a DoH proxy between Pi-hole and Cloudflare:
  cloudflared:
    image: cloudflare/cloudflared:latest
    container_name: cloudflared
    restart: unless-stopped
    command: proxy-dns --address 0.0.0.0 --port 5053 --upstream https://1.1.1.1/dns-query
    networks:
      dns_net:
ipv4_address: 172.30.9.4Then point Pi-hole at 172.30.9.4#5053 instead of Unbound.
Grafana Dashboard
Export Pi-hole metrics via pihole-exporter and visualize query rates, block rates, and top blocked domains in a Grafana dashboard (pairs with the Prometheus + Grafana project).
Integrate with Traefik
If you're running the Traefik reverse proxy setup, add the Pi-hole admin UI as a routed service with HTTPS and authentication middleware so you can access https://pihole.yourdomain.com from anywhere on your VPN.
Malware Domain Feeds
Add threat intelligence blocklists from abuse.ch, Emerging Threats, and Spamhaus to harden Pi-hole into a lightweight DNS firewall — blocking malware C2, phishing domains, and botnet infrastructure at the network level before any device can reach them.