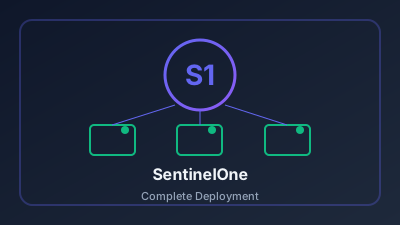
SentinelOne Complete Deployment Guide
Deploy enterprise-grade endpoint detection and response (EDR) with SentinelOne. This project covers the complete lifecycle from initial setup through advanced threat hunting and automated response.
Project Overview
What We're Building
┌─────────────────────────────────────────────────────────────────────┐
│               SentinelOne Enterprise Deployment                     │
├─────────────────────────────────────────────────────────────────────┤
│                                                                     │
│  ┌────────────────┐                                                │
│  │  SentinelOne   │                                                │
│  │   Management   │◀────────────────────────────────────────┐      │
│  │    Console     │                                         │      │
│  └───────┬────────┘                                         │      │
│          │                                                  │      │
│          │                                                  │      │
│          ▼                                                  │      │
│  ┌────────────────────────────────────────────────────────────────┐│
│  │                    Endpoint Protection                          ││
│  │  ┌──────────────┐ ┌──────────────┐ ┌──────────────┐           ││
│  │  │   Windows    │ │    macOS     │ │    Linux     │           ││
│  │  │  Endpoints   │ │  Endpoints   │ │   Servers    │           ││
│  │  │   (500+)     │ │    (100+)    │ │    (50+)     │           ││
│  │  └──────────────┘ └──────────────┘ └──────────────┘           ││
│  └────────────────────────────────────────────────────────────────┘│
│                                                                     │
│  ┌────────────────────────────────────────────────────────────────┐│
│  │                    Security Operations                          ││
│  │  ┌──────────────┐ ┌──────────────┐ ┌──────────────┐           ││
│  │  │   Threat     │ │   Response   │ │   Threat     │           ││
│  │  │  Detection   │ │  Playbooks   │ │   Hunting    │           ││
│  │  └──────────────┘ └──────────────┘ └──────────────┘           ││
│  └────────────────────────────────────────────────────────────────┘│
│                                                                     │
└─────────────────────────────────────────────────────────────────────┘Prerequisites
- SentinelOne license with required seats
- SentinelOne Management Console access
- Windows Server 2016+/Windows 10+ endpoints
- Admin access to deployment infrastructure (GPO, SCCM, or Intune)
- Network connectivity to SentinelOne cloud
Part 1: Console Configuration
Step 1: Site and Group Structure
Design your organizational hierarchy:
Account: Company Name
├── Site: North America
│   ├── Group: Workstations
│   ├── Group: Servers
│   └── Group: Executives
├── Site: Europe
│   ├── Group: Workstations
│   └── Group: Servers
└── Site: Development
└── Group: Dev-WorkstationsCreate Site:
- Navigate to Settings → Sites
- Click Add Site
- Configure:
- Site Name:
North America - Site Type: Default
- Token expiration: 365 days
- Site Name:
Create Groups:
- Navigate to site → Groups
- Add groups for logical separation
- Assign policies to groups
Step 2: Configure Policies
Create Base Policy:
- Navigate to Settings → Policies
- Click Create Policy
- Configure settings:
| Category | Setting | Recommended Value |
|---|---|---|
| Agent | Auto-Update | Enabled |
| Agent | Update Schedule | Production (Delayed) |
| Protection | Engine Mode | Protect |
| Protection | Scan on Write | Enabled |
| Protection | Deep Visibility | Enabled |
| Network | Firewall Control | Enabled |
| Response | Remediation | Auto-Remediate |
| Response | Quarantine | Enabled |
Policy for Servers:
Policy Name: Server-Protection-Policy
Settings:
  Agent Mode: Protect
  Remediation: Auto-Remediate
  Rollback: Enabled
  Performance Focus: Balanced
  Scan Intensity: Low (reduce server impact)
  Deep Visibility: Enabled
Network Quarantine: Manual (prevent accidental isolation)Policy for High-Security:
Policy Name: Executive-HighSecurity-Policy
Settings:
  Agent Mode: Protect
  USB Control: Block Unknown
  Bluetooth: Monitor
  Anti-Tampering: Maximum
  Network Quarantine: Enabled
Firewall: Strict ProfileStep 3: Configure Exclusions
Navigate to: Settings → Exclusions
Common Exclusions (Base):
| Type | Path/Hash | Reason |
|---|---|---|
| Path | C:\Program Files\<Backup Software>\ | Backup agent |
| Path | C:\Windows\Temp\<LOB App>\ | Business app temp |
| Process | sqlservr.exe | SQL Server performance |
| Certificate | <Vendor Certificate> | Trusted vendor |
PowerShell: Export/Import Exclusions
# Export exclusions to CSV for documentation
$s1mgmt = "https://usea1-xxx.sentinelone.net"
$apiToken = "<API-Token>"

$headers = @{
    "Authorization" = "APIToken $apiToken"
    "Content-Type" = "application/json"
}

$exclusions = Invoke-RestMethod -Uri "$s1mgmt/web/api/v2.1/exclusions" -Headers $headers -Method Get

$exclusions.data | Select-Object type, value, description, osType |
Export-Csv ".\sentinelone-exclusions.csv" -NoTypeInformationPart 2: Agent Deployment
Step 4: Download Agent Packages
Console Method:
- Navigate to Settings → Updates
- Download packages for each OS:
- Windows:
.exeor.msi - macOS:
.pkg - Linux:
.rpmor.deb
- Windows:
Step 5: Deploy via GPO (Windows)
Create GPO Deployment:
:: deploy-sentinelone.bat
@echo off

SET INSTALLER_PATH=\\fileserver\software\SentinelOne\
SET SITE_TOKEN=<your-site-token>
SET LOG_PATH=C:\Windows\Temp\S1Install.log

:: Check if already installed
sc query SentinelAgent >nul 2>&1
IF %ERRORLEVEL% EQU 0 (
    echo SentinelOne already installed. Exiting.
    exit /b 0
)

:: Install SentinelOne
msiexec /i "%INSTALLER_PATH%SentinelOneInstaller.msi" SITE_TOKEN=%SITE_TOKEN% /qn /l*v %LOG_PATH%

IF %ERRORLEVEL% EQU 0 (
    echo Installation successful
) ELSE (
    echo Installation failed with error %ERRORLEVEL%
)GPO Configuration:
- Create GPO:
Deploy-SentinelOne - Computer Configuration → Policies → Windows Settings → Scripts → Startup
- Add deployment script
- Link to target OUs
Step 6: Deploy via SCCM/MECM
Create Application:
# SCCM Application Detection Script
$S1Service = Get-Service -Name "SentinelAgent" -ErrorAction SilentlyContinue
$MinVersion = [Version]"23.4.1.0"

if ($S1Service) {
    $AgentPath = "C:\Program Files\SentinelOne\Sentinel Agent*\SentinelAgent.exe"
    $AgentFile = Get-Item $AgentPath -ErrorAction SilentlyContinue
    if ($AgentFile) {
        $CurrentVersion = [Version]$AgentFile.VersionInfo.FileVersion
        if ($CurrentVersion -ge $MinVersion) {
            Write-Host "Installed"
            exit 0
        }
    }
}
exit 1Installation Command:
SentinelOneInstaller_windows.exe -t "<SITE_TOKEN>" -qUninstallation Command:
"C:\Program Files\SentinelOne\Sentinel Agent <version>\Uninstall.exe" /uninstall /q /passphrase="<PASSPHRASE>"Step 7: Deploy via Intune
Create Win32 App:
- Package:
SentinelOneInstaller.intunewin - Install command:
SentinelOneInstaller.exe -t "TOKEN" -q - Uninstall command:
cmd /c "C:\Program Files\SentinelOne\Sentinel Agent*\Uninstall.exe" /uninstall /q /passphrase="PASS" - Detection rule: File exists
C:\Program Files\SentinelOne\Sentinel Agent*\SentinelAgent.exe
Step 8: Deploy to macOS
Install Command:
#!/bin/bash
SITE_TOKEN="<your-site-token>"
INSTALLER_PATH="/tmp/SentinelOne.pkg"

# Download installer (or copy from MDM)
# curl -o $INSTALLER_PATH "https://..."

# Install with token
sudo installer -pkg $INSTALLER_PATH -target /

# Register with site token
sudo /Library/Sentinel/sentinel-agent.bundle/Contents/MacOS/sentinelctl set registration-token $SITE_TOKEN

# Start agent
sudo /Library/Sentinel/sentinel-agent.bundle/Contents/MacOS/sentinelctl control startStep 9: Deploy to Linux
RPM-based (RHEL/CentOS):
#!/bin/bash
SITE_TOKEN="<your-site-token>"

# Install dependencies
yum install -y libc.so.6

# Install agent
rpm -i SentinelAgent_linux.rpm

# Register
/opt/sentinelone/bin/sentinelctl management token set "$SITE_TOKEN"

# Start
/opt/sentinelone/bin/sentinelctl control startDEB-based (Ubuntu/Debian):
#!/bin/bash
SITE_TOKEN="<your-site-token>"

# Install
dpkg -i SentinelAgent_linux.deb

# Register and start
/opt/sentinelone/bin/sentinelctl management token set "$SITE_TOKEN"
/opt/sentinelone/bin/sentinelctl control startPart 3: Validation and Monitoring
Step 10: Verify Deployment
Console Verification:
- Navigate to Sentinels
- Filter by site/group
- Check agent status:
Online,Updated - Verify Deep Visibility:
Enabled
PowerShell Deployment Report:
$headers = @{
    "Authorization" = "APIToken $apiToken"
    "Content-Type" = "application/json"
}

# Get all agents
$agents = Invoke-RestMethod -Uri "$s1mgmt/web/api/v2.1/agents" -Headers $headers -Method Get

# Summary report
$agents.data | Group-Object -Property osType | Select-Object Name, Count

# Find agents with issues
$agents.data | Where-Object { $_.isActive -eq $false -or $_.isUpToDate -eq $false } |
    Select-Object computerName, osType, isActive, isUpToDate, lastActiveDate |
Export-Csv ".\agents-issues.csv" -NoTypeInformationStep 11: Test Detection
EICAR Test:
# Generate EICAR test file (will be detected and quarantined)
$eicar = 'X5O!P%@AP[4\PZX54(P^)7CC)7}$EICAR-STANDARD-ANTIVIRUS-TEST-FILE!$H+H*'
$eicar | Out-File -FilePath "C:\Test\eicar.txt" -Encoding asciiVerify Detection:
- Navigate to Incidents
- Find EICAR test detection
- Verify threat was automatically resolved
Part 4: Threat Hunting with Deep Visibility
Step 12: Deep Visibility Queries
Navigate to: Visibility → Deep Visibility
Suspicious PowerShell Execution:
EventType = "Process Creation" AND
TgtProcCmdLine ContainsCIS "-enc" OR
TgtProcCmdLine ContainsCIS "encodedcommand" OR
TgtProcCmdLine ContainsCIS "bypass" AND
TgtProcName = "powershell.exe"LSASS Access Detection:
EventType = "Open Remote Process Handle" AND
TgtProcName = "lsass.exe" AND
SrcProcName != "csrss.exe" AND
SrcProcName != "services.exe"Suspicious Network Connections:
EventType = "IP Connect" AND
DstPort In (4444, 5555, 6666, 1337, 8080) AND
SrcProcName != "svchost.exe"Lateral Movement Detection:
EventType = "Process Creation" AND
(TgtProcName = "psexec.exe" OR
 TgtProcName = "wmic.exe" OR
 TgtProcName = "winrs.exe") AND
SrcProcCmdLine ContainsCIS "\\"Persistence Mechanisms:
EventType = "Registry Value Modified" AND
RegistryPath ContainsCIS "CurrentVersion\Run"Step 13: Create Custom Rules
Navigate to: Settings → Custom Rules
Rule: Detect Mimikatz:
Rule Name: Mimikatz Execution
Query: TgtProcCmdLine ContainsCIS "sekurlsa" OR TgtProcCmdLine ContainsCIS "logonpasswords" OR TgtProcCmdLine ContainsCIS "mimikatz"
Severity: Critical
Action: Alert + Network QuarantineRule: Detect Cobalt Strike Beacon:
Rule Name: Cobalt Strike Indicators
Query: |
  (SrcProcCmdLine ContainsCIS "beacon" AND EventType = "DNS Lookup") OR
  (DstPort = 50050 AND EventType = "IP Connect") OR
  (TgtFilePath ContainsCIS "cobaltstrike")
Severity: Critical
Action: Alert + Quarantine + Network IsolatePart 5: Response Automation
Step 14: Response Playbooks
API-Based Automated Response:
# response_automation.py
import requests
import json

class SentinelOneResponse:
    def __init__(self, base_url, api_token):
        self.base_url = base_url
        self.headers = {
            "Authorization": f"APIToken {api_token}",
            "Content-Type": "application/json"
        }

    def network_quarantine(self, agent_id):
        """Isolate endpoint from network."""
        endpoint = f"{self.base_url}/web/api/v2.1/agents/{agent_id}/actions/network-quarantine"
        response = requests.post(endpoint, headers=self.headers)
        return response.json()

    def fetch_logs(self, agent_id):
        """Fetch agent logs for investigation."""
        endpoint = f"{self.base_url}/web/api/v2.1/agents/{agent_id}/actions/fetch-logs"
        response = requests.post(endpoint, headers=self.headers)
        return response.json()

    def full_disk_scan(self, agent_id):
        """Initiate full disk scan."""
        endpoint = f"{self.base_url}/web/api/v2.1/agents/{agent_id}/actions/scan"
        payload = {"data": {"scanType": "full"}}
        response = requests.post(endpoint, headers=self.headers, json=payload)
        return response.json()

    def kill_process(self, agent_id, process_name):
        """Kill suspicious process."""
        endpoint = f"{self.base_url}/web/api/v2.1/agents/{agent_id}/actions/kill-process"
        payload = {"data": {"processName": process_name}}
        response = requests.post(endpoint, headers=self.headers, json=payload)
        return response.json()

    def remediate_threat(self, threat_id):
        """Remediate detected threat."""
        endpoint = f"{self.base_url}/web/api/v2.1/threats/{threat_id}/actions/mitigate"
        payload = {"data": {"action": "remediate"}}
        response = requests.post(endpoint, headers=self.headers, json=payload)
        return response.json()

# Example usage
s1 = SentinelOneResponse("https://usea1-xxx.sentinelone.net", "<token>")
s1.network_quarantine("agent-uuid-here")Step 15: SOAR Integration
Webhook for Threat Alerts:
- Navigate to Settings → Notifications
- Create webhook:
- URL:
https://soar.company.com/api/sentinelone/webhook - Events: Threats, Alerts
- Format: JSON
- URL:
Sample Webhook Payload:
{
  "event": "threat",
  "threatInfo": {
    "id": "123456",
    "threatName": "Ransomware.Generic",
    "classification": "Malware",
    "agentId": "agent-uuid",
    "computerName": "DESKTOP-ABC123",
    "siteName": "North America"
  },
  "timestamp": "2026-02-03T14:30:00Z"
}Part 6: Maintenance and Operations
Step 16: Regular Maintenance Tasks
Weekly Tasks:
- Review unresolved threats
- Check agent health across sites
- Review new exclusion requests
- Update custom detection rules
Monthly Tasks:
- Agent version compliance report
- Review and optimize policies
- Test disaster recovery procedures
- Update threat hunting queries
Step 17: Reporting
Executive Summary Script:
$headers = @{
    "Authorization" = "APIToken $apiToken"
    "Content-Type" = "application/json"
}

# Get threats from last 30 days
$thirtyDaysAgo = (Get-Date).AddDays(-30).ToString("yyyy-MM-ddT00:00:00Z")
$threats = Invoke-RestMethod -Uri "$s1mgmt/web/api/v2.1/threats?createdAt__gte=$thirtyDaysAgo" -Headers $headers

# Summary
$summary = @{
    TotalThreats = $threats.data.Count
    Mitigated = ($threats.data | Where-Object { $_.mitigationStatus -eq "mitigated" }).Count
    ByClassification = $threats.data | Group-Object classification | Select-Object Name, Count
    TopAffectedMachines = $threats.data | Group-Object computerName | Sort-Object Count -Descending | Select-Object -First 5
}

$summary | ConvertTo-Json -Depth 3Verification Checklist
Deployment Complete:
- All endpoints have agent installed
- Agents reporting to correct site/group
- Policies assigned appropriately
- Deep Visibility enabled
Protection Validated:
- EICAR test detected and remediated
- Custom detection rules active
- Response automation tested
- Integration with SOC tools complete
Operations Ready:
- Exclusions documented
- Reporting configured
- Team trained on console
- Escalation procedures defined
Troubleshooting
| Issue | Cause | Solution |
|---|---|---|
| Agent not connecting | Network/firewall | Allow SentinelOne cloud IPs |
| High CPU usage | Full scan running | Schedule scans off-hours |
| False positives | Missing exclusions | Add path/process exclusion |
| Agent won't install | Prerequisites missing | Install VC++ Runtime |
Resources
Questions? Reach out in our community Discord!